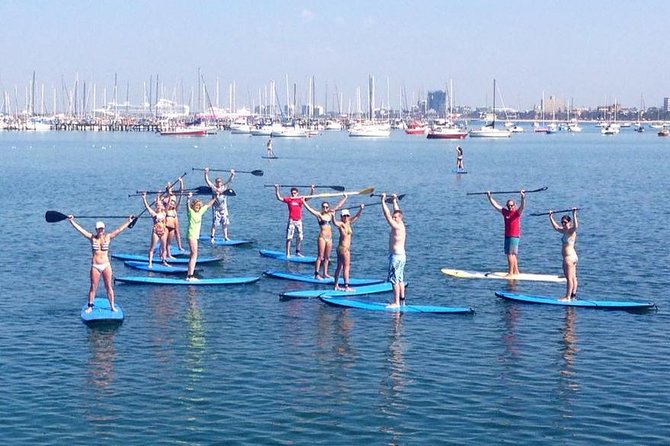
REVIEW · ST KILDA
Great Ocean Road and Wildlife Tour for Backpackers aged 18-35
Book on Viator →Operated by Ride Tours · Bookable on Viator
The Great Ocean Road hits different at sunrise. This 12-hour St Kilda/Melbourne day trip is built for young backpackers (18–35) who want famous viewpoints, short walks where it counts, and a guide who keeps the group moving without making it feel like a cattle call. I like that you get private transportation for the whole route, plus organized stops for photos along the way.
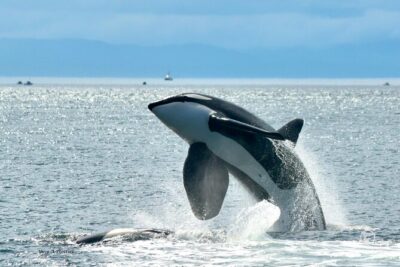
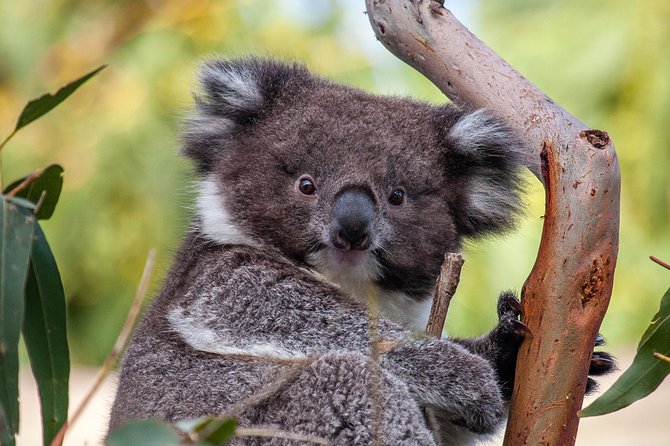
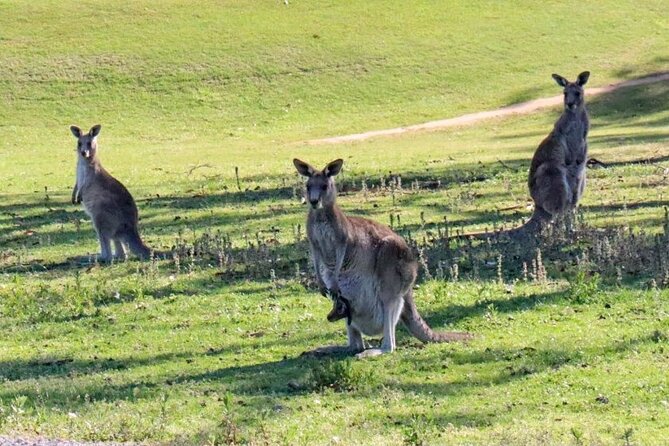
I also love the wildlife angle. You’re specifically set up for classic Aussie coastal nature stops, with chances to spot koalas and kangaroos, and the guides (some mentioned by name like Mark, Matt, Cam, James, Marc, and Raph) have a knack for finding where locals hang out.
One consideration: it’s a long day, and you’ll do it at a fairly full schedule pace. If you prefer slow travel and lots of long hikes, you may feel like you’re skipping past a few things—this is the kind of day trip best paired with a slower multi-day option later.
In This Review
- Quick Hits: What Makes This Tour Work
- Your Day on the Great Ocean Road: What to Expect From Start to Finish
- Getting Picked Up Around Melbourne (and Why It Matters)
- The Photo Strategy: Stops Built for Real Time, Not Just Speed
- Stop-by-Stop: What Each Place Gives You (and What to Watch For)
- Port Campbell National Park: Start With the Big Cliff Drama
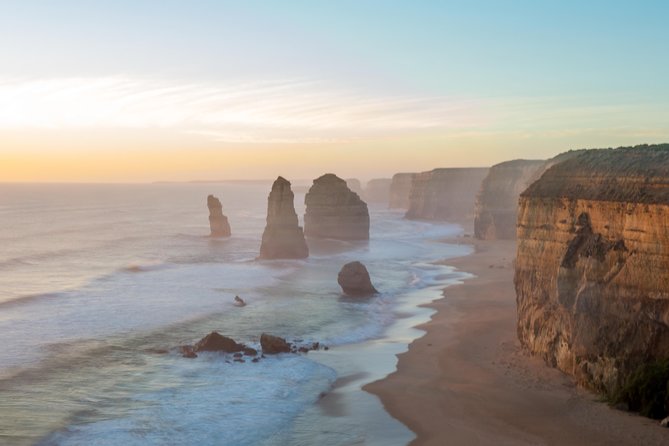
- Twelve Apostles Marine National Park: The Main Photo Moment
- The Razorback: A Short Stop With a Serious Name
- Gibsons Steps: Stairs, Sand, and a Classic Viewpoint
- Loch Ard Gorge: A Quiet Coast Stroll
- Apollo Bay: Lunch Time and a Seaside Reset
- Kennett River: Wildlife Chances, Not a Guarantee
- Lorne Pier: 360 Views and Ocean Life Watching
- Fairhaven Beach: Long Sand, Short Stop
- Memorial Archway: The Great Ocean Road Sign Photo
- Guides and Group Size: Why the Experience Feels Human
- The Coffee and Tea Break: Small Inclusion, Real Value
- What It Costs and Why It’s a Fair Deal
- Who This Tour Fits Best (and Who Might Want Something Else)
- Weather and Timing: The Real-World Factor on the Coast
- Should You Book This Great Ocean Road Wildlife Tour for Backpackers?
- FAQ
- What is the tour duration?
- What time does the tour start, and where does it pick up?
- What age range is this tour for?
- How big is the group?
- Do I need to pay for admission at each stop?
- What happens if the weather is poor?
Quick Hits: What Makes This Tour Work
- Photo stops on demand: You can stop for pictures along the way, not just at the main pulls-offs.
- Coffee and tea breaks included: Small thing, big morale when you’re up early and moving all day.
- Most of the coast’s greatest hits: 12 Apostles area, Razorback, Loch Ard Gorge, Kennett River, and more.
- Wildlife-focused timing: Planned stops aimed at spotting koalas and kangaroos in the wild.
- Small group size: Max 18 people keeps it social but still easy to manage.
- Good mix of short walks and viewpoints: Moderate physical effort, with time at each main stop.
Your Day on the Great Ocean Road: What to Expect From Start to Finish
This is a classic one-day Great Ocean Road experience, but tailored to the 18–35 crowd. The tour starts at 7:00am, which means you’re not stuck watching the coast in harsh midday light, and it gives you time to cover a lot of the famous stretch before the day gets long. Expect a steady rhythm: drive, stop, walk a bit, photo, then back in the van.
The vibe is backpacker-friendly rather than “luxury coach” energy. The group stays small (up to 18 travelers), and the schedule is designed for people who want to see real highlights without planning every turn themselves. If you’re traveling solo, this kind of group size also makes it easier to talk to others without forcing it.
You should also know this is a moderate fitness day. You’re not told to train for Everest here, but there are stair steps and cliffside areas where comfortable mobility helps. The good news: most stops are timed so you can enjoy the views without feeling trapped on the clock.
You can also read our reviews of more tours and experiences in St Kilda.

Getting Picked Up Around Melbourne (and Why It Matters)
The pickup setup is a big part of the value. You start from several hostels in Melbourne, which removes the hassle of figuring out transport before you even reach St Kilda or the departure area. Since you’re also offered pickup, you can focus on the day ahead instead of spending your morning on logistics.
The tour includes a mobile ticket, which is convenient if you’re the type who loses paper confirmations in your bag. And because the tour uses private transportation all the way, you’re not constantly dealing with strangers squeezing in and out or waiting around at each transfer point.
This is also one reason it works well for younger travelers: it’s efficient. You’re paying for organization, not just seats on a road trip.
The Photo Strategy: Stops Built for Real Time, Not Just Speed
A standout feature is that you can stop any time for photos along the way. That sounds minor until you’re actually on the Great Ocean Road, where the best angles often appear without warning. Sometimes you notice something late; sometimes clouds or tide timing suddenly looks perfect. This tour gives you room to react.
You’ll also find that the stops aren’t just quick pull-offs. Some locations include a longer browse time, and a few points include short walks that let you get your bearings—especially around the famous cliffs. Expect frequent opportunities to step out, shoot photos, and regroup as a group.
Just keep your camera ready, because you’ll be doing this all day. The payoff is you leave with more variety than the typical one-photo-per-stop tour.
Stop-by-Stop: What Each Place Gives You (and What to Watch For)
Port Campbell National Park: Start With the Big Cliff Drama
The day opens at Port Campbell National Park with an emphasis on the cliff scenery around the iconic limestone formations. You get about 1 hour here, and admission is included for this stop. It’s a strong opener because the cliffs set the tone: dramatic, windy, and very Australian in that rugged coastal way.
Tip for your photos: dress for coastal weather even if Melbourne is behaving. A breeze can hit hard near the cliffs, and you’ll enjoy the walk more if you’re prepared.

Twelve Apostles Marine National Park: The Main Photo Moment
Next up is the Twelve Apostles Marine National Park, with around 45 minutes and admission included. This is the reason most people book. The formations are shaped by erosion over time, turning soft limestone into caves and then arches.
One thing to know: the ground can be uneven near viewpoint areas. You don’t need hiking shoes for a marathon, but comfortable footwear helps. Also, the best photos often mean standing in the wind longer than you expect—so plan for it mentally.
The Razorback: A Short Stop With a Serious Name
Then comes The Razorback. It’s a 30-minute stop, admission is listed as free, and it’s one of those natural rock formations that looks jagged and narrow in a way that makes you stop mid-sentence. It’s worth it because it adds variety beyond the big-ticket 12 Apostles photos.
This is a good break spot in the schedule—short enough to keep momentum, long enough to get multiple angles.
Gibsons Steps: Stairs, Sand, and a Classic Viewpoint
At Gibsons Steps, you’ll explore the beach area near the 12 Apostles and Gog & Magog using a staircase cut into the sandstone cliffs. You get about 30 minutes, and admission is included here.
This is one of the more active stops of the day because you’re dealing with stairs. Go at your own pace, and remember: the best photos often mean you’ll be halfway down for a moment longer than planned. If you’re wearing anything slippery, swap to something with decent grip.
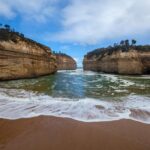
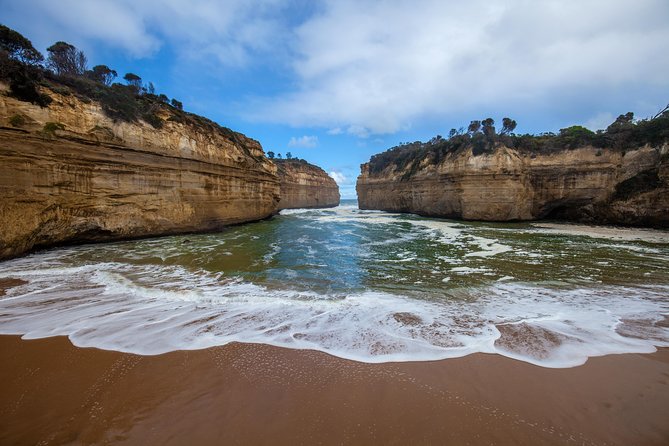
Loch Ard Gorge: A Quiet Coast Stroll
Loch Ard Gorge gets about 1 hour, and admission is listed as free. The vibe here is more walking-and-looking than posing-and-bolting. The dramatic limestone cliffs frame the beach tucked away along the coast, and it feels like the tour slows down just enough to breathe.
This stop is also a nice contrast after the Razorback’s rock punch and the 12 Apostles’ main viewpoint intensity. If you like photos that look a bit less identical to everyone else’s, Loch Ard is where you’ll earn them.
Apollo Bay: Lunch Time and a Seaside Reset
You then hit Apollo Bay for about 1 hour. Admission is listed as free, and this is a chance to grab lunch (on your own expense). Apollo Bay is described as a picturesque seaside village tucked near the Otways foothills, which basically means: it’s a welcome reset from cliffs and ocean rock.
I like this kind of stop because it gives you options. If you want coffee, a sit-down meal, or a quick stroll, Apollo Bay gives you room to choose without the group losing time.
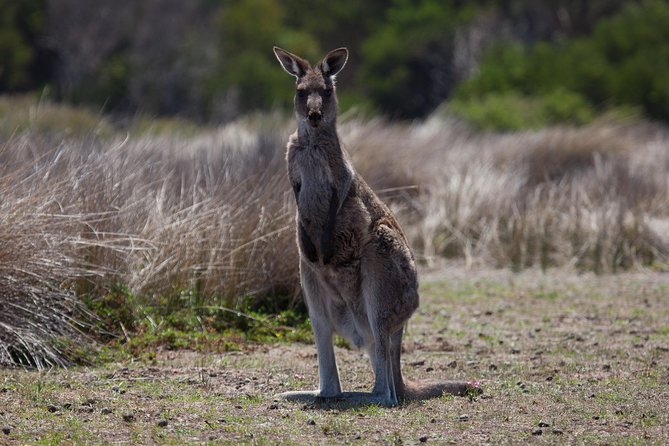
Kennett River: Wildlife Chances, Not a Guarantee
Next is Kennett River for around 30 minutes. This is a dedicated wildlife-style stop, and it’s specifically noted as a place to see wild koalas and birds. Admission is listed as free.
Here’s the honest way to think about wildlife on tours: you’re increasing your odds, not buying a ticket to a guaranteed sighting. Still, this is exactly the kind of stop where people feel like the day’s worth it. Some guides have been known to spot more than koalas too, and you’ll be watching for movement in trees rather than just looking at the ground.
Lorne Pier: 360 Views and Ocean Life Watching
At The Lorne Pier, you get about 30 minutes, and admission is listed as included. The big draw is the 360 views, plus time to explore while looking for bird and sea life around the area.
This stop works well if you want that “I can feel the coastline” moment without committing to a long walk. Also, if the wind is intense earlier in the day, you might find conditions feel a bit different here—still breezy, just with a different view angle.
Fairhaven Beach: Long Sand, Short Stop
Fairhaven Beach comes next with around 20 minutes. Admission is included, and it’s described as a pristine stretch of gold sand running for over six kilometers from Painkalac Creek at Aireys Inlet.
You won’t walk the whole length in 20 minutes, of course. But even a short stretch gives you that wide-open beach feeling, which is important for a day that’s otherwise dominated by cliffs and rock formations.
Memorial Archway: The Great Ocean Road Sign Photo
Finally, you finish with a Great Ocean Road Memorial Archway stop for about 10 minutes, free entry. Admission is free here, and it’s the classic sign-photo moment.
It’s short on purpose. By now, you’ve had your main sights, and this stop is mostly about getting one last “I was here” picture before heading back.
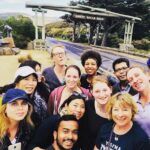
Guides and Group Size: Why the Experience Feels Human
The tour stands or falls on the guide. In the feedback you’ll see a pattern: people rave about guides who keep the day fun, informative, and easy to follow while also helping with logistics like group photos. Names that pop up include Mark, Matt, Cam, James, Marc, and Raph, and the common theme is that they don’t just read facts—they help you actually enjoy the stops.
You also get practical help on photo moments. Multiple mentions highlight guides taking initiative to help people take pictures, plus guidance on where wildlife might show up. That small support matters when you’re traveling solo or you’re trying to capture the cliff views without wrestling with a selfie stick.
Group size (up to 18) also makes the day feel less chaotic. It’s big enough to meet other young travelers, but small enough that you’re not shouting over everyone.
The Coffee and Tea Break: Small Inclusion, Real Value
Tea and coffee are included, and I love this because it’s one of those “you’ll appreciate it later” benefits. With a 7:00am start, you’re often still waking up when the road starts working its magic. A warm drink can turn the early hours from stressful into pleasant.
Even better: it’s built in. You don’t need to hunt for an overpriced stop or find a cafe near your pickup location. It keeps energy up while you’re counting down to the first big viewpoint.
What It Costs and Why It’s a Fair Deal
This tour is priced at $87.46 per person. For a one-day Great Ocean Road trip, the main value is that you’re paying for full-day transport plus a schedule that includes admission at several of the key stops (like the 12 Apostles area and other major viewpoints), while still giving you free-time flexibility at places like Apollo Bay and Kennett River.
Could you do it cheaper by driving yourself? Sure, if you have a car and don’t mind planning, fuel, parking, and timing. But if you’re a backpacker without a car, the real cost is time and hassle. This tour swaps that for organization—plus the chance to spot wildlife with a guide who knows where the stops matter.
In short: the price makes sense when you value convenience and a guided, stop-driven plan more than you value total independence.
Who This Tour Fits Best (and Who Might Want Something Else)

This tour is ideal for backpackers and students aged 18–35 who want a structured Great Ocean Road day with plenty of photos, short walks, and wildlife chances. If you’re traveling solo and want an easy way to meet people, the group size helps.
It also suits you if you’re the kind of traveler who likes learning as you go. The guide-style feedback points to lots of answering questions and sharing stories, not just reciting names of places.
But it may not fit you if you want a slower, deeper nature experience. The day is full, and some feedback suggests trimming a stop or two might help some people feel less rushed. If that sounds like you, look for a 2-day version offered by the same operator—because the whole point would be more breathing room.
Weather and Timing: The Real-World Factor on the Coast
The experience requires good weather, and if it’s canceled due to poor weather, you’re offered a different date or a full refund. That’s important because the coast is exposed, and dramatic views depend on sky conditions.
Also remember the start time is early. Even in Australia, coastal mornings can feel cooler than you expect. Pack layers so you can handle wind and temperature swings without ruining the day.
Should You Book This Great Ocean Road Wildlife Tour for Backpackers?
If you want a single-day Great Ocean Road highlight reel—12 Apostles, Loch Ard Gorge, Razorback, and wildlife stops—this is a strong pick. The combo of organized transport, frequent photo opportunities, included tea/coffee, and guide help with spotting wildlife makes it feel worth the effort, especially if you don’t have a car.
Book it if:
- You’re comfortable with a long day and short walks.
- You care about wildlife chances, not just scenery.
- You want an easy way to travel from Melbourne with a small group.
Consider another option if:
- You hate rush pacing and want more time per viewpoint.
- You prefer long hikes over quick strolls.
- You’re very sensitive to early starts and coastal wind.
If you’re on the fence, your best move is to decide whether you want the “Great Ocean Road greatest hits in one day” experience—or whether you’d rather slow it down across two days.
FAQ
What is the tour duration?
The tour runs for about 12 hours.
What time does the tour start, and where does it pick up?
It starts at 7:00am and pickup is offered from several hostels in Melbourne.
What age range is this tour for?
This experience is for passengers aged 18–35.
How big is the group?
The tour has a maximum group size of 18 travelers.
Do I need to pay for admission at each stop?
Some stops include admission tickets, while others are listed as free. Key included-admission stops include the 12 Apostles area and other major viewpoints on the route.
What happens if the weather is poor?
This experience requires good weather. If it’s canceled due to poor weather, you’ll be offered a different date or a full refund.