REVIEW · MELBOURNE
2-Day Melbourne to Adelaide Tour via Great Ocean Road Grampians
Book on Viator →Operated by Autopia Tours · Bookable on Viator
Two days can feel like a whirlwind, in the best way. This tour strings together Great Ocean Road icons and Grampians lookouts with live English commentary and a small group size (max 23). I really like that you’re not just driving through scenery—you’re pulled into story, photo stops, rainforest walks, and waterfall viewpoints.
Two things I’d put at the top: first, the guide-led pacing and live commentary helps you understand what you’re seeing while you’re seeing it. Second, you get the one-way transfer Melbourne → Adelaide plus an overnight in Halls Gap with breakfast, so you’re not scrambling to piece it together yourself. The big consideration is the schedule: you start early (7:35am) and you’ll be in a vehicle for long stretches, with only short stops for photos and walks.
In This Review
- What This Tour Really Delivers: Icons + Wild Nature, Not Just Stops
- Small-Group Comfort: The Mini-Coach Setup
- Day 1 on the Great Ocean Road: Anglesea to Halls Gap
- Anglesea: A Quick Start in Coastal Victoria
- Apollo Bay: Town Time and the Road’s Big Feel
- Great Ocean Road Memorial Archway: The Photo Moment
- Great Otway National Park: Rainforest Tall Trees
- Loch Ard Gorge: Shipwreck Story + a Hidden Beach
- The Twelve Apostles: The Main Event (and Wildlife)
- Halls Gap: Arrive Late, Settle In
- Day 2 in the Grampians: Boroka, Reeds, Falls, Then Adelaide
- Grampians National Park: Boroka Lookout and Reeds Lookout/Balconies
- MacKenzie Falls: Waterfall Time
- Back to Boroka and Reeds: Morning View Refinement
- Lunch, Then the South Australian Transition
- Adelaide Arrival Around 7:30pm
- What the Included Meals and Overnight in Halls Gap Mean for You
- Meals Included: Dinner + Lunch + Breakfast
- Overnight: Private Ensuites and Budget-Friendly Shared Rooms
- Wildlife and That Guided Walking: How to Make It Work
- Price and Value: Why $412.41 Can Be a Smart Deal
- When This Tour Fits Best (and When It Doesn’t)
- Should You Book It? My Take
- FAQ
- What’s the tour duration?
- What’s included in the price?
- What are the main stops on the Great Ocean Road?
- What do you do in Grampians National Park?
- Where do you stay overnight?
- How big is the group?
- Where do you meet and where do you end?
- What time does the tour start?
- What’s the walking requirement?
- Is the tour weather-dependent?
- How much luggage can I bring?
What This Tour Really Delivers: Icons + Wild Nature, Not Just Stops
This is the kind of trip that works because it treats travel like part of the experience. You travel from Melbourne toward Adelaide while stacking major sights in a tight loop: ocean cliffs on the Great Ocean Road, then mountain views and waterfalls in Grampians National Park. It’s a 2-day format that still leaves room for real walks (around 2km total) and wildlife spotting in natural habitat.
The “limited to 23” size matters. Smaller groups move faster at stops and feel less like a factory line. In the guide department, I’ve seen this operator’s guides called out by name—Lauren is praised for being knowledgeable and fun, and guides like Jacob, Cory, and Dandy get credit for stories, local music, and smart, scenic choices. That kind of on-the-ground guiding usually turns generic viewpoints into places you actually remember.
One more practical note: it runs in all weather. That’s good because you’re not stuck waiting for perfect skies, but it means you should pack layers and something for rain or mist, especially on the rainforest and mountain sections.
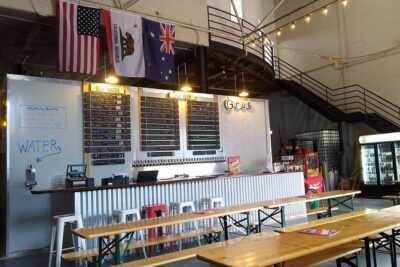
Small-Group Comfort: The Mini-Coach Setup
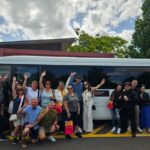
You travel in an air-conditioned mini-coach. That helps a lot on the long road legs, especially if it’s warm or if you get a wet day on the coastline or in the hills. This is also one-way touring (Melbourne to Adelaide), so you’re not doing backtracking like some shorter day tours.
The luggage rules are simple and worth planning around: you’re allowed 1 suitcase and 1 carry-on bag. If your gear is oversized (surfboards, bikes, golf clubs), there may be restrictions—so check ahead. And since you’re on a schedule, pack like you’ll need what you need fast: water, a light jacket, sun protection, and a layer for cooler mountain air.
Mobility-wise, the tour asks for moderate physical fitness. The walking portion is listed as guided bush walking of about 2km total, which is manageable for many people, but it’s not a “no-walking” sightseeing day.
You can also read our reviews of more tours and experiences in Melbourne

Day 1 on the Great Ocean Road: Anglesea to Halls Gap
Day 1 is built like a best-of reel: surf coast towns, rainforest trees, shipwreck history, and those famous cliff silhouettes. You’ll get a blend of quick photo stops and longer nature stops, so you’re not constantly staring out the window.
Anglesea: A Quick Start in Coastal Victoria
The tour kicks off with a stop in Anglesea. The time here is listed as about 30 minutes, so think of it as a stretch-break plus a chance to get oriented on the Surf Coast vibe.
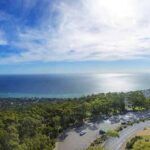
Apollo Bay: Town Time and the Road’s Big Feel
Next up is Apollo Bay (about 1 hour). This stop is there for you to reset before the signature cliff country—plus you’ll pass through the wider Great Ocean Road area where the coastline starts to feel dramatic. You also have a morning tea option at the Great Ocean Road Chocolaterie, which is one of those practical “food break” stops that keeps the day from turning into snack chaos.
If you’re the type who likes to buy something small and local—this is a good moment. If you’re gluten-free or picky about coffee, it’s also easier to handle before you hit the cliff circuit.
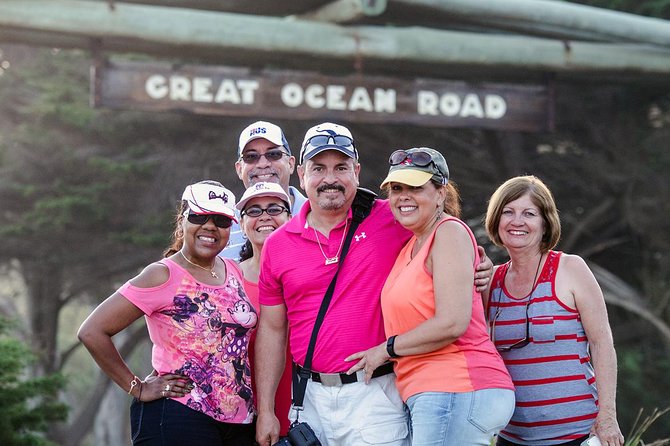
Great Ocean Road Memorial Archway: The Photo Moment
The Memorial Archway stop is short (about 15 minutes). It’s basically your “I’m on the Great Ocean Road” confirmation photo, paired with the classic sign shot. Don’t build a long conversation here. Use it to get the picture you’ll want later.
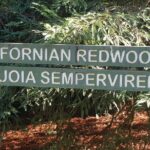
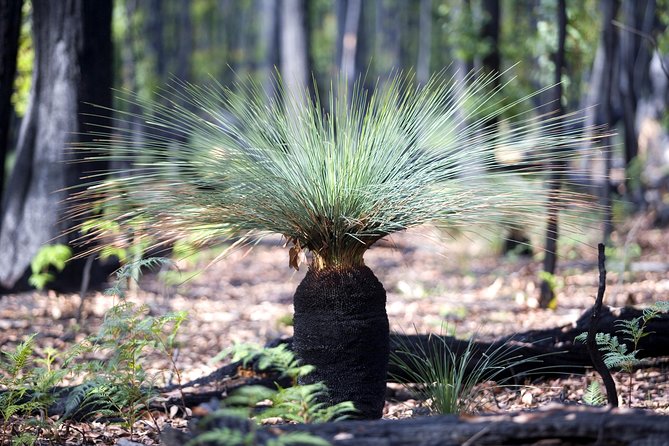
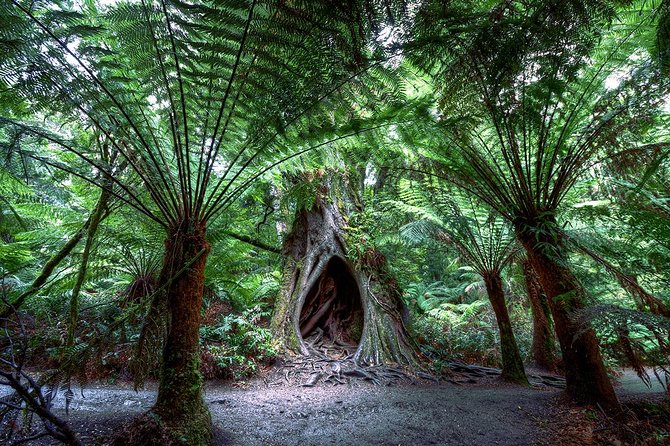
Great Otway National Park: Rainforest Tall Trees
Then you head into Great Otway National Park. You’ll spend about 1 hour exploring rainforest with some of the world’s tallest trees. This is a nice contrast day-to-day: the ocean cliffs give you open sky views, while the rainforest gives you shade, damp air, and a totally different soundscape.
Practical tip: bring something you can wear comfortably if you’re in mist or light rain. Even if the weather is okay, rainforests can feel cooler.
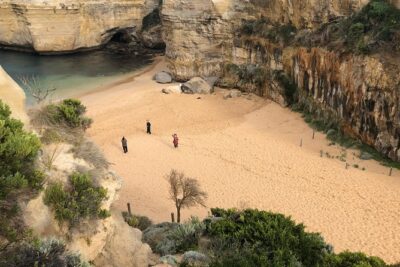
Loch Ard Gorge: Shipwreck Story + a Hidden Beach
Loch Ard Gorge is one of the day’s included stops (about 1 hour). You’ll learn the shipwreck-coast tale, visit the hidden beach, and see the well-known formations associated with the Two-day Great Ocean Road theme.
This stop is especially good if you like history tied to geography. You’re looking at natural features, but the story helps you connect what you’re seeing to why the coastline earned its name as shipwreck country.
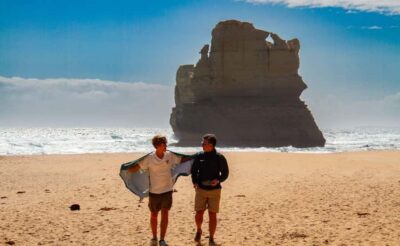
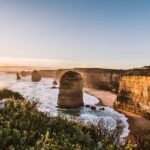
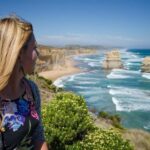
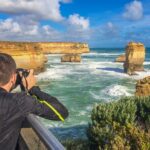
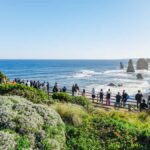
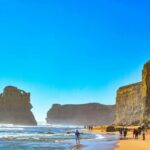
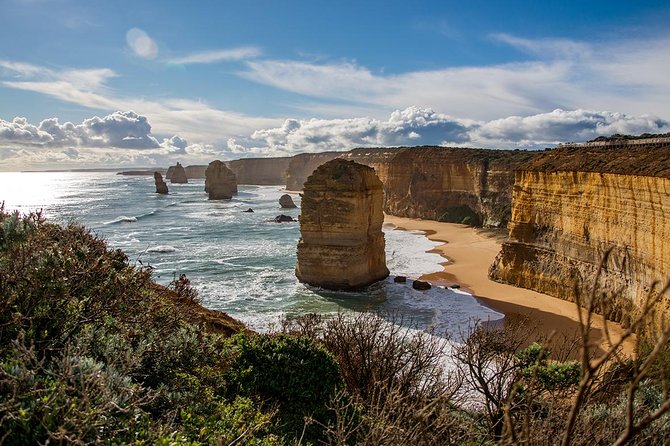
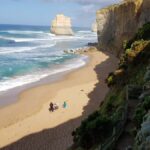
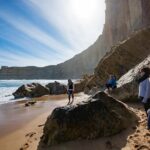
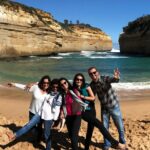
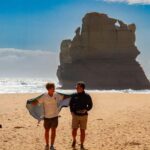
The Twelve Apostles: The Main Event (and Wildlife)
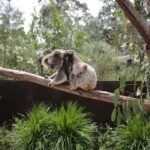
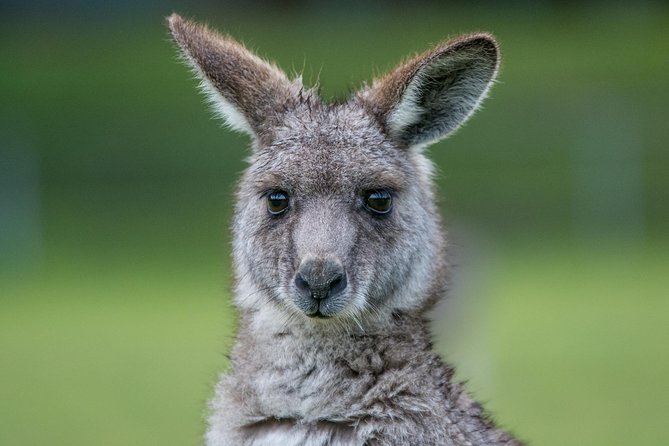
The Twelve Apostles stop is listed as about 1 hour and is included. You’ll get island cliffs and archways, plus opportunities to see native Australian wildlife along the way.
Because this is a high-demand area, plan for the kind of crowd energy that comes with iconic attractions. That said, the guided pacing helps. You’re not just dropped in and left to fend for yourself; you’re guided to the viewpoint flow.
Halls Gap: Arrive Late, Settle In
After the Great Ocean Road day, you arrive in Halls Gap at night and settle into your accommodation. The itinerary lists about 3 hours here, which likely includes check-in and dinner timing. This is a smart move: sleeping in the Grampians area means Day 2 doesn’t waste time getting you into position for sunrise-style viewpoints.
Day 2 in the Grampians: Boroka, Reeds, Falls, Then Adelaide
Day 2 starts early. The first priority is lookouts with wide views over rugged terrain—your chance to understand why Grampians National Park is so loved by photographers and hikers.
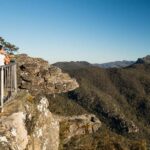
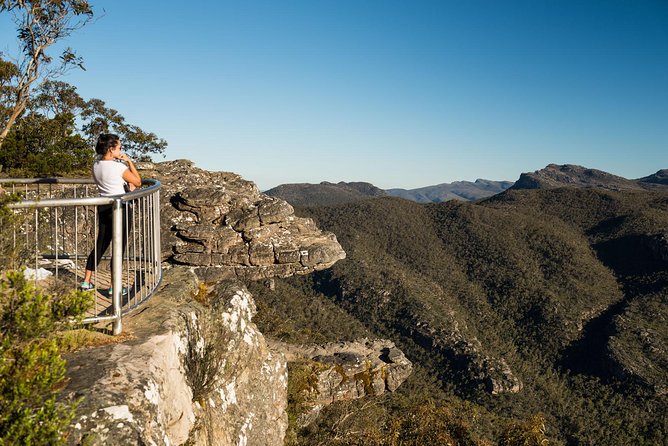
Grampians National Park: Boroka Lookout and Reeds Lookout/Balconies
Your morning begins with up to Boroka Lookout and Reeds Lookout/Balconies. The combined time shown is about 2 hours. These stops aren’t just “stand here and take a picture.” They’re built to give you a view of the ranges that you can’t really understand until you’re high enough to see the shape of the terrain.
If you’re sensitive to heights, go slowly and use the viewing areas carefully. Also, morning can feel cooler even when the coast is warm.
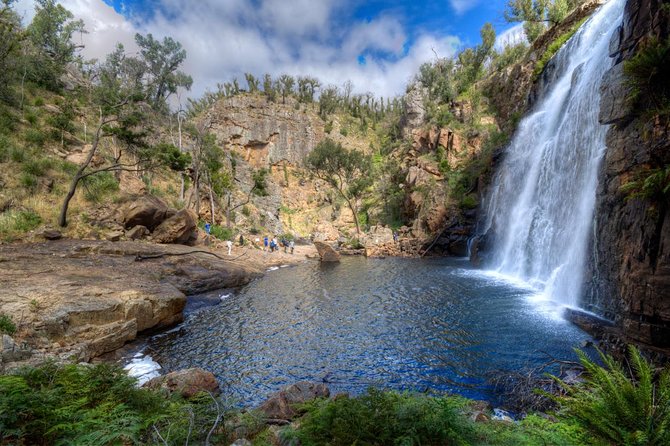
MacKenzie Falls: Waterfall Time
Next is MacKenzie Falls (about 1 hour). The tour frames it as waterfalls plus hiking trails, and that’s exactly what you’ll want to aim for: spend your time where you can see and hear water clearly.
This is a good stop for anyone who likes a “move your body a little” day. It’s not a long trek, but it’s enough to feel like you did something besides photo shooting.
Back to Boroka and Reeds: Morning View Refinement
The itinerary lists Boroka Lookout and Reeds Lookout again as separate stops (about 1 hour each). That sounds like extra driving time, but in practice it can mean you get two angles, plus time to revisit conditions if wind or cloud changes your view. It also gives the group flexibility if the first round is busy.
Lunch, Then the South Australian Transition
After lunch, you head west away from the coastline and mountains toward Adelaide. You pass Dimboola Pink Lake and Nhill, cross the South Australian border into Bordertown, and then continue on.
Those are stop names you’d miss if you were driving solo without a plan. They also break the long Adelaide arrival stretch so you don’t feel like your only job is sitting.
Adelaide Arrival Around 7:30pm
You arrive in Adelaide around 7:30pm. The end point is Adelaide Central Bus Station, Franklin St 83 Franklin St. This is a convenient drop-off if you’re staying in the city center or continuing by tram/bus.
What the Included Meals and Overnight in Halls Gap Mean for You
This tour handles the basics that are usually the pain points in multi-day self-planning: meals and lodging.
Meals Included: Dinner + Lunch + Breakfast
Dinner, lunch, and breakfast are included. That matters because it removes a lot of decision fatigue on Day 1 and prevents you from eating random roadside snacks twice in a row.
Meals not listed are on you, and there’s explicitly “plenty of opportunity to purchase food along the way.” Translation: you’re not trapped with pre-packaged choices. But you should still plan to bring some snacks just in case your timing doesn’t match your appetite.
Overnight: Private Ensuites and Budget-Friendly Shared Rooms
You’ll stay one night in Halls Gap. The tour notes you may get private ensuites or budget-friendly shared rooms, depending on what’s available. That’s a big value point: you’re paying a single tour price that bundles accommodation in the Grampians region, which is usually where independent trips can get expensive once you add last-minute room hunting.
If privacy matters a lot, decide early and consider how you feel about shared accommodation options.
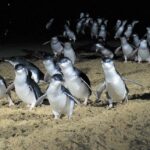
Wildlife and That Guided Walking: How to Make It Work
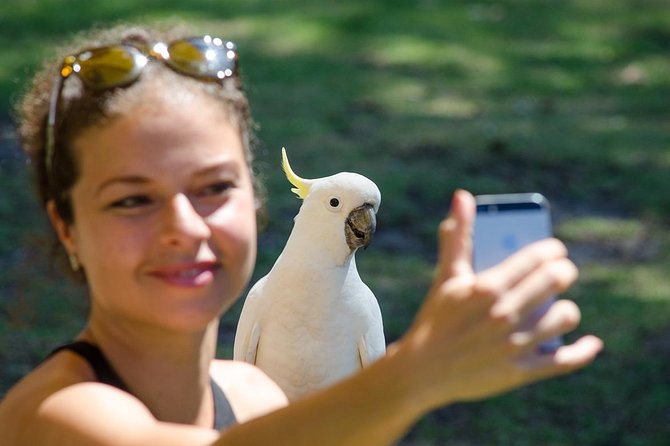
Wildlife is part of the promise here. The tour includes Australian wildlife sightings in natural habitat, plus native wildlife opportunities around key stops. You’ll also do guided bush walking of about 2km total across the trip.
Here’s how to get more out of it without overthinking:
- Wear shoes you’re comfortable walking in. Mountain viewpoints and rainforest surfaces can be uneven.
- Keep your phone ready but don’t stare through it. Some of the best sightings happen when you pause and let the moment come to you.
- Ask your guide to point out what they see. The guide’s live commentary is more useful when you’re actively looking for clues—movement, sounds, and habitat details.
And if you’re a koala person, this route is designed around wildlife chances, including looking for koalas in the wild as part of the broader experience. You can’t guarantee an animal shows up on cue, but this tour is built around spending time where the chances are better.
Price and Value: Why $412.41 Can Be a Smart Deal
At $412.41 per person for a 2-day Melbourne-to-Adelaide experience, the price is in the “this is serious but not wild” range. The value comes from what’s bundled, not from the driving alone.
What you’re getting included:
- One-way transfer from Melbourne to Adelaide
- A full day of Great Ocean Road and a full day in Grampians
- Overnight accommodation in Halls Gap (with breakfast)
- Dinner and lunch
- All national park entry fees
- A guided bush walk (~2km total)
- Live English commentary on the mini-coach
If you tried to DIY this, you’d likely pay for transportation, park fees, and at least one night’s lodging. You’d also need to figure out pacing—where to stop, how long to stay, and which viewpoints matter. This tour does that planning for you, and it does it with the “limited to 23” group advantage.
One other value angle: it’s commonly booked about 118 days in advance on average. If you have fixed travel dates, don’t wait until the last minute and hope it works out.
When This Tour Fits Best (and When It Doesn’t)
This is a great match if you want a guided “great hits” route without turning it into spreadsheets. It’s also strong if you like learning while you travel—live commentary, rainforest context, shipwreck-coast storytelling, and lookout interpretation all make the time feel purposeful.
You’ll probably enjoy it most if:
- You like iconic sights but don’t want to run between them alone
- You’re okay with early mornings and long driving days
- You want park entry fees and meals handled
It may not be the best fit if:
- You get motion sickness easily (you’ll be on the road a lot)
- You hate early starts (pickup begins at 7:35am)
- You’re seeking a totally flexible, stop-when-you-feel-like-it itinerary (this one is paced and structured)
Should You Book It? My Take
I’d book this if you want two of Victoria’s most famous natural regions stacked into one efficient trip with guiding that explains what you’re seeing. The combination—Great Otway rainforest and shipwreck coast on Day 1, then Grampians lookouts and waterfall time on Day 2—makes the most of the limited days you have.
Book it sooner than later, especially since it’s frequently reserved about 118 days ahead. And pack for weather and walking, not just for photos. If you do those two things, you’ll spend less time worrying and more time enjoying the views, the stories, and the wildlife chances that only happen when you’re moving through the right places at the right time.
FAQ
What’s the tour duration?
It runs for 2 days. The itinerary is built around travel from Melbourne to Adelaide across Great Ocean Road and Grampians.
What’s included in the price?
The tour includes dinner, lunch, breakfast, 1 night of accommodation in Halls Gap, all national park entry fees, and guided bush walking (about 2km total). It also includes transportation by air-conditioned mini-coach, live English commentary, and a one-way transfer from Melbourne to Adelaide.
What are the main stops on the Great Ocean Road?
You’ll stop in Anglesea, Apollo Bay, and the Great Ocean Road Memorial Archway. You’ll also visit Great Otway National Park, Loch Ard Gorge, and the Twelve Apostles.
What do you do in Grampians National Park?
You’ll visit lookouts including Boroka Lookout and Reeds Lookout/Balconies, plus MacKenzie Falls. There’s also a guided bush walking component.
Where do you stay overnight?
You stay one night in Halls Gap. The accommodation is described as private ensuites and budget-friendly shared rooms available.
How big is the group?
The tour is limited to a maximum of 23 travelers.
Where do you meet and where do you end?
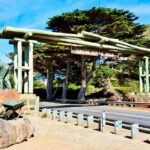
You start at Immigration Museum, 400 Flinders St, Melbourne, and you end at Adelaide Central Bus Station, Franklin St 83 Franklin St, Adelaide. Drop-off is listed at 85 Franklin St.
What time does the tour start?
The start time is 7:35am.
What’s the walking requirement?
There is guided bush walking listed at about 2km total. The tour recommends travelers have moderate physical fitness.
Is the tour weather-dependent?
It operates in all weather conditions, so you should dress appropriately for rain, wind, and changing conditions.
How much luggage can I bring?
You’re allowed a maximum of 1 suitcase and 1 carry-on bag. Oversized items may have restrictions, so it’s best to ask in advance if you’re bringing something like a surfboard, bike, or golf clubs.