REVIEW · MELBOURNE
Great Ocean Road & Beyond 4 day Adventure Melbourne to Adelaide
Book on Viator →Operated by See Adelaide · Bookable on Viator
Curves, koalas, caves, and time to breathe. This 4-day Melbourne to Adelaide adventure lets you ride in an air-conditioned minivan comfort setup while you rack up big-name coastal stops, from the Great Ocean Road to early-morning coastal light at the Twelve Apostles, plus off-road detours into caves, sinkholes, and wildlife. I love that it’s guided and organized end-to-end, and I love the pacing that gives you real time to walk and look, not just point and drive. The one drawback is you will still spend a lot of your day in the vehicle, so if you want total independence and flexible stops, this route is more structured than DIY.
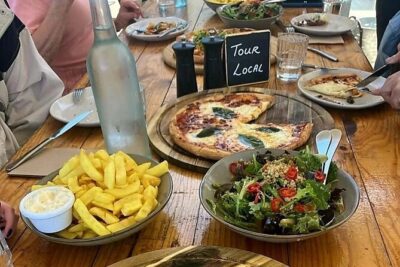
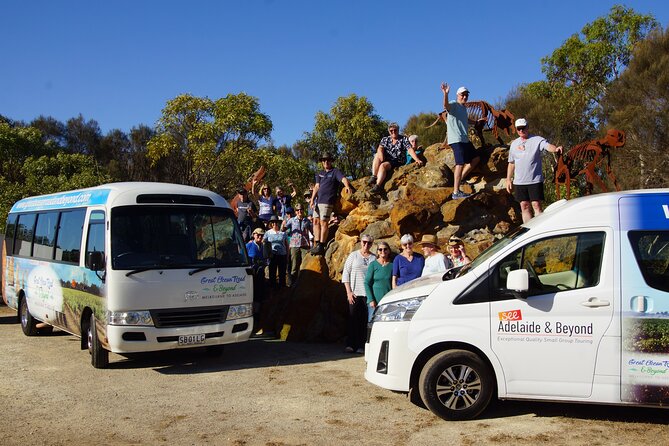
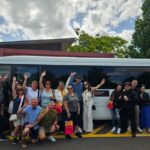
What makes the experience feel more relaxed is the small-group size (max 16) and a driver-guide who talks as you go. I also like the fact that you get 3 nights in 4-star hotels with breakfasts and lunches handled, so you’re not spending your limited vacation time hunting for meals between viewpoints. Still, you’ll want to budget for dinners on your own since evening meals aren’t included.
For the price of $1,574.35 per person, you’re paying for more than scenery. You’re covering transportation, lodging, most meals, key admissions, and even wine tasting. One thing to consider: alcohol isn’t included, so you may pay extra at the wine stop if you want more than the tasting.
In This Review
- Key Things I’d Watch For Before You Book
- Why This Melbourne-to-Adelaide Minivan Trip Feels Easier Than Renting a Car
- Great Ocean Road Starts Right: Memorial Arch, Koalas, and Otways Rainforest Walks
- Loch Ard Gorge, London Bridge, and the Twelve Apostles Without the Grind
- Tower Hill Wildlife Reserve and Port Fairy: Where the Trip Gets Personal
- Blue Lake and Umpherston Sinkhole: Volcanic and Garden Weirdness in South Australia
- Naracoorte Caves and Bremerton Wines: World Heritage Meets a Scheduled Slow Down
- Coonalpyn Silos, Hahndorf German Village, and Mount Lofty Summit Above Adelaide
- Price and What You’re Really Buying at $1,574.35 Per Person
- Transportation Comfort, Group Size, and How to Pack for This Route
- Who This 4-Day Tour Suits Best
- Should You Book This Great Ocean Road & Beyond Adventure?
- FAQ
- What is the duration of the tour?
- Where does the tour start and end?
- What transport is used for the Melbourne to Adelaide journey?
- Are meals included?
- Is wine tasting included?
- How large are the groups?
- What is the cancellation policy for a full refund?
Key Things I’d Watch For Before You Book
- Small group of up to 16: easier listening to your guide and quicker movement at stops.
- 4-star stays for 3 nights with breakfasts and lunches included, which really cuts day-to-day hassle.
- Early access energy at iconic coastal viewpoints, including morning light at the Twelve Apostles.
- Wildlife-focused stops with hands-on elements at Tower Hill Wildlife Reserve.
- Big variety in just 4 days, from Great Ocean Road coast walks to UNESCO-listed Naracoorte Caves.
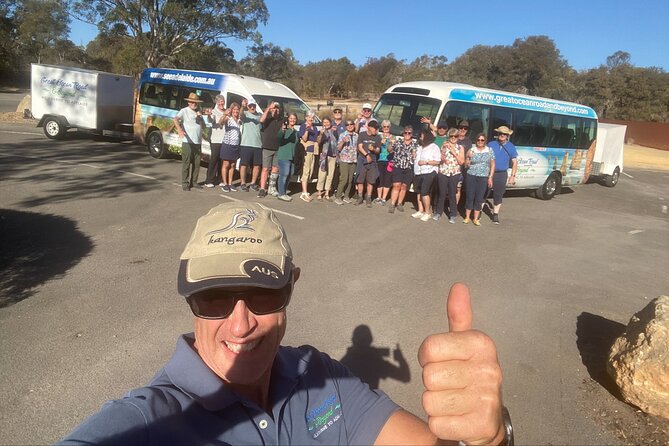
Why This Melbourne-to-Adelaide Minivan Trip Feels Easier Than Renting a Car
This tour is built for people who want the route, the sights, and the storytelling, without the stress of navigation and constant driving. You get a prestige air-conditioned minivan with reclining seats, plus room for luggage, so it’s practical even if you’re bringing more than a day bag.
The other big win is time on the road is time you can use. Instead of watching the road like it’s a full-time job, you can turn your attention to the coast, the lookout angles, and the quick stops where a little walking turns a view into a memory. Your guide also adds context along the way, so you’re not just seeing places—you’re understanding why they matter.
The trade-off is simple: you trade freedom for comfort. A minivan route has a schedule, and you’ll follow it. If you love lingering for an extra hour or want to detour to a random side track, this format won’t be as flexible as driving yourself.
You can also read our reviews of more tours and experiences in Melbourne.

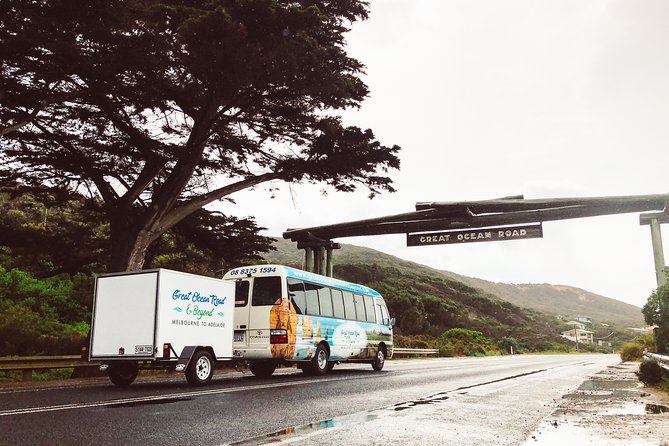
Great Ocean Road Starts Right: Memorial Arch, Koalas, and Otways Rainforest Walks
Day one is a fast start on one of Australia’s most famous coastal drives, and it’s not just about one lookout. You begin on the stretch between Torquay and Allansford and get time to explore the route’s three distinct sections: the Surf Coast, the Otway Ranges, and the Shipwreck Coast.
A fun early moment is the chance for a koala spotting stop. It’s short, but these are the kinds of “be ready” pauses that make a guided day feel lively, especially when you’re traveling as a group.
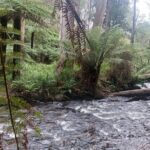
Then you move into Great Otway National Park, where the vibe shifts from open coastline to rugged coastland, beaches, and rainforest-style walking. One detail I like here is the focus on manageable walk time rather than sprinting between pins on a map. You’ll also hear about highlights like Triplet Falls—three cascades—so you know what you’re aiming for when you arrive.
You also hit the Great Ocean Road Memorial Archway early in the journey. It’s a classic photo moment, but it also works as a mental marker: this is where the “road trip” becomes a proper route. It helps you get your bearings fast, even if you don’t know the area yet.
Practical note: bring a camera strap you can trust and wear shoes that handle occasional damp ground. The region can feel cooler and wetter when you’re near the forest walks.
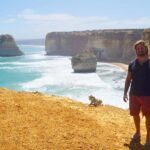
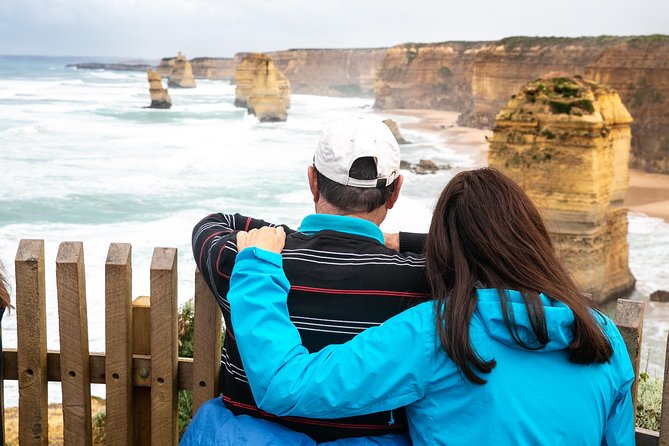
Loch Ard Gorge, London Bridge, and the Twelve Apostles Without the Grind
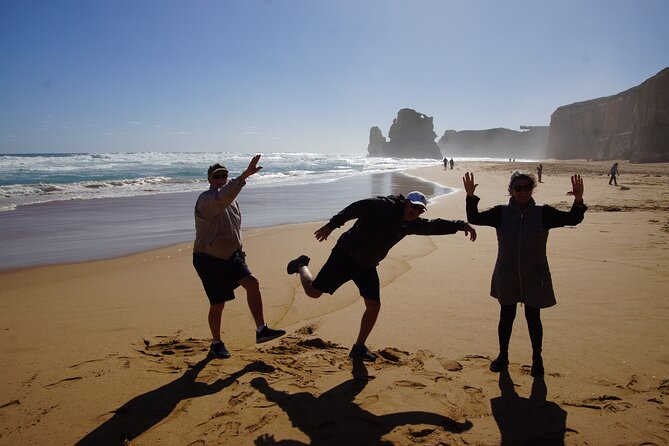
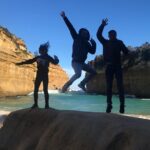
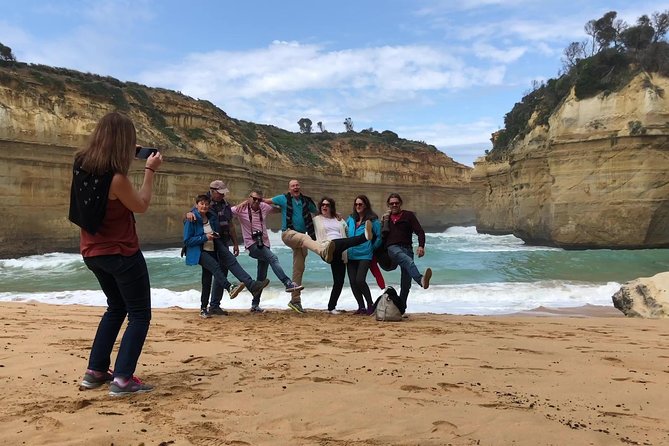
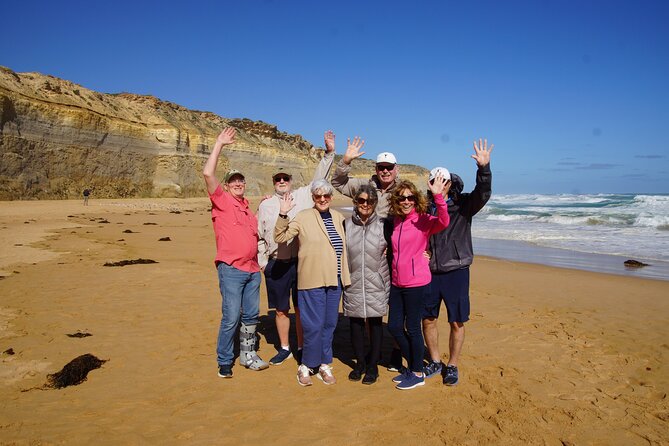
Day two is where the scenery gets serious. You start with Loch Ard Gorge, stepping down to the beach area for toe-dips and photos. This stop works because it’s not just a viewing platform—you get a small walking window that lets you frame the water and cliffs from different angles.
Next up is London Bridge, an offshore natural arch in Port Campbell National Park. The appeal here is that the rock is the star. You don’t need to be a geology expert to appreciate the way sea erosion shapes the coast. A quick stop here can still feel satisfying because the feature is dramatic even at a distance.
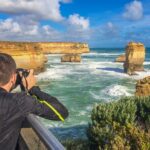
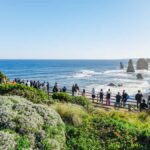
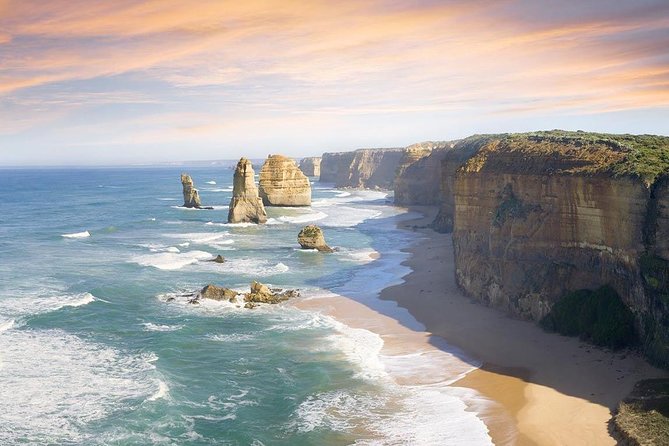
Then come the Twelve Apostles, and this tour aims to help you beat the worst of the crowds. The schedule is designed for morning light, which matters for how the stacks look on camera. The stacks tend to look different as the sun changes, and seeing them earlier rather than later usually improves your odds for good light and less shoulder-to-shoulder standing.
One small drawback: because these are top attractions, you may have to accept that it’s still busy at the busiest viewpoints. But the “morning sunlight” approach is a smart way to reduce friction.
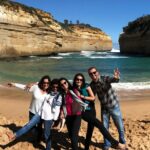
Tower Hill Wildlife Reserve and Port Fairy: Where the Trip Gets Personal
After the coastal icons, you shift into a different kind of Great Ocean Road experience: wildlife and local flavor. Tower Hill Wildlife Reserve is a standout here because it’s built around seeing animals and learning at the same time.
You’re set up for an Aboriginal interpretation focus, plus bush tucker and Australian wildlife, and even boomerang throwing. Even if you’re not expecting a full-day program, it’s the kind of stop that breaks the pattern of cliffs and long viewpoints. It gives you hands-on moments, not just photo moments.
Then you make time around Port Fairy and the regional visitor information area. I like this kind of mid-route pause because it turns the trip from a checklist into a real place. Port Fairy feels like one of those towns where you can stroll, stretch your legs, and figure out what you’d do if you had an extra day in the region.
If you’re someone who gets restless when every stop is short and rushed, Port Fairy helps reset you.
Blue Lake and Umpherston Sinkhole: Volcanic and Garden Weirdness in South Australia
Day three moves inland a bit, but it stays full of atmosphere and surprises.
First is the Blue Lake near Mount Gambier (Warwar). You get a short visit window, but the lake’s reputation is strong enough that it’s worth seeing even briefly. It’s a crater lake tied to a dormant volcanic maar complex, and that volcanic origin explains the showy color story people associate with it.
Next is Umpherston Sinkhole (Balumbul), a sunken garden created in 1886. This stop is great if you like “slow looking” rather than “fast walking.” View platforms and paths mean you can take your time moving around the garden space, and it feels cooler and calmer than the open-road days.
After that, you stop at Petticoat Lane in Penola. The attraction here is the 19th-century feel—original cottages and gardens that let you step into the past without turning it into a theme park.
Then you visit the Mary MacKillop Heritage Centre. It’s one of those stops that gives the trip context beyond scenery. Even if you’re not a museum person, a heritage stop often helps break up the day so the wildlife and cliffs don’t blur together.

Naracoorte Caves and Bremerton Wines: World Heritage Meets a Scheduled Slow Down
Day four is where the trip stacks the big-ticket experiences.
First is Naracoorte Caves National Park, recognized for its extensive fossil record and listed as UNESCO World Heritage–related. You get a longer time window here, and the admission is included, which is a nice touch because caves can be hard to cost out when you’re planning on your own.
This stop is valuable for two reasons. One, it’s a change from coastal views—you’re under rock and in a different kind of environment. Two, it adds scientific interest that feels real, not just scenic branding.
After the caves, you shift into a South Australian wine experience at Bremerton Wines and Bremerton Vineyards. Wine tasting is included, and you’ll have time to experience it rather than rushing through a quick pour.
A practical thought: alcohol isn’t included beyond the tasting, and the minimum drinking age is 18. If you’re a non-drinker or traveling with someone who doesn’t want alcohol, the rest of the day still makes sense because the caves and later town stops are still the main attractions.
Coonalpyn Silos, Hahndorf German Village, and Mount Lofty Summit Above Adelaide
The last day isn’t just a repeat of city sightseeing. You finish with a mix of modern art, heritage town atmosphere, and a viewpoint that signals you’re arriving for real.
Coonalpyn Silos are next—those oversized art silos that people stop for because they look best when you can stand far enough back to see the full work. This is short on time, but it’s the kind of stop that helps you leave with one last “wow” photo.
Then you head to the German Village Shop in Hahndorf. Hahndorf is known for its 19th-century Lutheran migrant roots and German-style architecture. It’s also associated with artisanal food, so even if you don’t plan to shop, you’ll likely want to browse.
Finally, you end at Mount Lofty Summit. This is a payoff stop: Adelaide from Adelaide’s highest peak, with a first big look over the city. You get a short lookout window, long enough to orient yourself if you’re staying in Adelaide proper or along the coast.
Your tour ends with drop-off at hotels and accommodations in Adelaide and Glenelg, which is helpful because you don’t have to arrange a separate transfer.
Price and What You’re Really Buying at $1,574.35 Per Person
The sticker price is high compared to a DIY plan, but the value is easier to see when you count what’s bundled.
You get:
- 3 nights of 4-star accommodation
- 3 breakfasts and 4 lunches
- Air-conditioned minivan transport with a driver-guide
- Wine tasting
- Selected admissions included across the route
What’s not included:
- Alcoholic beverages beyond included tasting
- Evening meals
For many people, the biggest hidden cost of DIY is time and stress. You’d need to drive long stretches, park, navigate viewpoints, and figure out where to sleep and what to eat each night. This tour handles that planning, and the result is you can spend your energy on walking, photographing, and listening.
Where the math can tip against you is if you already have your own vehicle and you love total flexibility. If you want to stop whenever and skip whenever, you might feel boxed in. If you’re the opposite—happy to follow a plan and want it done for you—this pricing structure tends to feel fair.
Transportation Comfort, Group Size, and How to Pack for This Route
The vehicle is described as prestige with reclining seats, air-conditioning, and room for large luggage. That matters because you’ll be doing multiple days of travel and multiple stops.
Group size is capped at 16, which is small enough that the guide can manage everyone’s timing without turning every photo stop into a herd. It also means you can often hear the commentary without fighting the noise.
Pack like you’re mixing coastal weather with occasional cooler inland garden and cave conditions. You might expect wind near the coast, and the park areas can feel damp or cool depending on the day. A light rain layer is a smart move.
Also, plan your camera habits. Some stops are short by nature (like arches and quick art moments), so keep your bag organized. If you’re fumbling at the start of a photo window, you’ll miss the best moment.
Who This 4-Day Tour Suits Best
This is a strong fit for you if:
- You want the Great Ocean Road highlight set without the driving effort
- You like guided context and “what you’re seeing” explanations
- You don’t want to plan lodging and meal logistics across several nights
- You’d rather be in a small group than on a large bus
It’s less ideal if you want maximum independence, long unscheduled breaks, or you strongly dislike structured schedules.
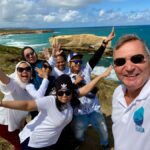
Based on guide feedback in the broader experience, the tour can feel extra fun and organized with hosts like Jens or Jason, and at least one guide has a food background, which can make meal choices feel more intentional.
Should You Book This Great Ocean Road & Beyond Adventure?
If you’re balancing a tight schedule with a big wish list, I think this is the kind of tour that earns its value. You’re getting a well-paced route that blends iconic coast stops, wildlife-focused time at Tower Hill, geological and garden oddities at Blue Lake and Umpherston, and a high-value heritage experience at Naracoorte Caves—plus wine tasting and a finish with Hahndorf and an Adelaide viewpoint.
If you’re the DIY type who loves driving the same roads at your own pace, then this might feel too fixed. But if you want a comfortable vehicle, included meals, 4-star lodging, and guided stops that help you see more with less friction, booking makes a lot of sense.
FAQ
What is the duration of the tour?
The tour runs for about 4 days.
Where does the tour start and end?
It starts in Melbourne (meeting at designated points) at 8:30 am and ends with drop-off at hotels and accommodations in Adelaide and Glenelg.
What transport is used for the Melbourne to Adelaide journey?
You travel by air-conditioned minivan with reclining seats, plus a driver-guide.
Are meals included?
Yes. The tour includes 3 breakfasts and 4 lunches, but evening meals are not included.
Is wine tasting included?
Yes, wine tasting is included as part of the experience.
How large are the groups?
The tour has a maximum group size of 16 travelers.
What is the cancellation policy for a full refund?
You can cancel up to 6 days in advance for a full refund. If you cancel 2–6 days before, the refund is 50%, and less than 2 days before is not refunded.